Thursday, January 7, 2016

Upgrade Windows


Upgrade Windows
In the previous topic, you installed Microsoft Windows from scratch. The other primary type of installation is an upgrade installation. In this topic, you will upgrade Windows.
As a system professional, you’ll probably be called upon to upgrade systems even more often than performing from-scratch installations. Software vendors such as Microsoft are constantly coming out with new operating system versions, and it is much more economical to upgrade existing systems when possible rather than to purchase new computer hardware with the new version pre-installed. Whether you are upgrading for an individual user or as part of a company-wide migration plan, the skills in this topic should help you upgrade older versions of Windows to the current version successfully.
Supported Upgrade Paths
Existing Windows installations can be directly upgraded to specific other versions of Windows.
Current Operating System
Windows 95
Windows 98/98 SE/Me Windows NT Workstation 4.0 Windows 2000 Professional

Windows XP Home Edition Windows XP Professional
Unsupported Upgrades
Can be Upgraded To
Windows 98, Windows 2000 Professional
Windows 2000 Professional, Windows XP Professional
Windows XP Professional; will be upgradeable to Windows Vista
Windows XP Professional Windows Vista
page433image14496 page433image14656
Upgrading Windows 95 directly to Windows XP Professional is not supported. It was possible to upgrade a Windows 95 computer to Windows 2000 Professional and subsequently to Win- dows XP Professional. However, Windows 2000 Professional is no longer commercially available. If you still have installation media for Windows 2000 you can follow this indirect upgrade path. Generally, it is best to perform a clean installation of Windows XP Professional on any systems that are still running Windows 95.
page434image1424 page434image1592
Explain to the students that you will discuss more details of network protocol configuration at a later point. This is just an issue to keep in mind during the upgrade preparation process.
Hardware Upgrade Compatibility
If you are upgrading an existing computer to a different version of Windows, you will need to check your existing hardware against the Tested Products List to ensure that the existing com- puter hardware is compatible with the target operating system. For Windows XP Professional, you can also run the Microsoft Windows Upgrade Advisor from the product compact disc to generate compatibility reports. The Setup program will also run a compatibility check during the upgrade process.
Network Compatibility Considerations
As part of the hardware compatibility check, you should verify that the new version of Win- dows will support the existing network adapter card. In most cases, the network configuration settings will upgrade smoothly to the new version of Windows if the card is supported.
However, when you are upgrading an older version of Windows, there may be cases in which you find that the old system is still running legacy protocols, such as NetBEUI and NWLink, that are not supported by current Windows network implementations. Because the current de facto standard network protocol is TCP/IP, you will need to plan to upgrade and configure these systems for TCP/IP during the upgrade process.
Software Upgrade Compatibility
Before upgrading, you should check the Tested Products List or run the Microsoft Windows Upgrade Advisor to verify that your existing applications will run properly on the new version of Windows. The Setup program will also run a compatibility check during the upgrade process. Applications written for Windows 2000 should work well on Windows XP; legacy applications might require one or more of the compatibility fixes built in to Windows XP. You can select an appropriate application compatibility mode for the application after you have upgraded the operating system.
Application Compatibility Modes
The Windows XP application compatibility modes are Windows 95, Windows 98/Windows Me, Windows NT 4.0, Windows 2000, 256 colors, and 640 x 480 screen resolution. You can set the appropriate mode for a particular application by running the Program Compatibility Wizard from Windows XP Help and Support Center. See the article “Windows XP Application Compatibility Technologies” at www.microsoft.com/technet/prodtechnol/winxppro/plan/ appcmpxp.mspx for more information.
Macintosh Software Compatibility
Applications that ran in previous releases of Mac OS X should be supported when you upgrade to any current release.
If you need to use Mac OS 9 applications on a Mac OS X system, you can do so in the Clas- sic environment in Mac OS X. To use the Classic environment, you must have a Mac OS 9 System Folder installed on your computer, either on the same hard disk as Mac OS X, or on another disk or disk partition. For more information on the Classic environment in Mac OS X, see www.apple.com/support/panther/moretopics/.
Apple also provides tools to enable IBM PC users to transfer files and software when migrat- ing from an IBM Windows PC to a Macintosh. For more information on moving from Windows to Macintosh, see www.apple.com/macosx/switch.
Linux Software Compatibility
Check your Linux vendor’s website and read the technical documentation for the distribution of Linux you plan to upgrade to in order to determine if your existing applications will be sup- ported under the new version. You can also check the resources at www.linux.org/apps for lists of Linux-compatible applications in various categories from a number of vendors. You can also register as a user at www.linux.org/user and post questions about particular applications in the online user forums.
How to Upgrade Windows
Procedure Reference: Upgrade to Windows XP Professional
To upgrade to Windows XP Professional:
  1. Verify that the computer meets the hardware requirements for Windows XP. You can run compatibility checks by clicking Check System Compatibility on the opening screen of the Windows XP installation CD-ROM.
  2. Back up any existing user data files.
  3. Insert the Windows XP Professional CD-ROM. The setup program should launch automatically. (You can also launch the winnt32.exe installation program manually from the installation source files.)
  4. Click Install Windows XP and select Upgrade as the installation type.
  5. Accept the license agreement and enter the Product Key.
  6. On the Get Updated Setup Files page, make the appropriate choice depending on whether or not you want to check for updated files on the Internet.
    • ●  Yes, Download The Updated Setup Files (Recommended).
    • ●  No, Skip This Step And Continue Installing Windows.
  7. Follow the remaining steps in the Setup Wizard to complete the installation.
  8. Log on to Windows XP.
  9. Connect to Windows Update and install any current Service Packs or critical security updates.
  10. Test the Windows installation to verify that the Setup program properly detected your hardware and that all system devices are working properly.
  11. If not all devices are functioning, use the Add Hardware tool in Control Panel to add any additional devices, or install new or updated device drivers from the Microsoft or manu- facturer’s website.
  12. Use the Add Or Remove Programs tool in Control Panel to add any desired additional Windows XP components to your system.


Installing and Configuring Operating Systems


Install Microsoft Windows
In this lesson, you will install and configure operating systems. The fundamental installation method is to install the operating system from scratch. In this topic, you will perform a fresh installation of Microsoft Windows.
Being able to perform a fresh installation of Windows can be important if you have built a custom computer system from scratch, if the system you purchased from a vendor did not have the correct system installed, or if you are completely redeploying existing hardware from one purpose to another. The skills and information in this topic will help you plan and perform a fresh installation properly whatever your technical and business requirements might be.
Windows System Requirements
Before installation, you must make sure that your hardware meets or exceeds the minimum requirements for the version of Windows you will install.
Mac OS System Requirements
The system requirements for Mac OS X Tiger are:
  • ●  A Macintosh computer with a PowerPC G3, G4, or G5 processor.
  • ●  Built-in FireWire support.
  • ●  A built-in display or a display connected to an Apple-supplied video card supported by your computer.
  • ●  A DVD drive for installation.
  • ●  256 MB of RAM.
  • ●  3 GB of available hard disk space minimum; 4 GB to install all developer tools.
    Linux System Requirements
    The hardware requirements for installing Linux will depend upon the distribution of Linux you choose. Linux is a portable operating system, and there are versions available for many differ- ent processor types, including Intel x86 and Pentium; Itanium; DEC Alpha; Sun Sparc; Motorola; and others. In general, a basic installation of Linux on a workstation might require as little as 16 or 32 MB of memory and 250 MB of disk space, but you might need several gigabytes of disk space for complete installations including all utilities.
    Hardware Compatibility
    You should check all your hardware to ensure that it is compatible with the version of Win- dows you plan to install. Microsoft tests and verifies hardware devices for different versions of Windows and maintains the results in the Windows Marketplace Tested Products List. For Windows XP Professional, you can also run the Microsoft Windows Upgrade Advisor from the product compact disc to generate compatibility reports.
    Macintosh Hardware Compatibility
    If your Macintosh computer meets the minimum requirements for Mac OS installation, the hardware should all be compatible with the operating system. You can verify that your hard- ware is supported by checking the list at http://www.apple.com/macosx/upgrade/ requirements.html.
    Linux Hardware Compatibility
    Because Linux is a portable operating system, it is compatible with a wide range of hardware. You will need to check with the vendor or provider of your Linux distribution to verify if your particular system hardware is supported by that distribution.
    One web resource you can use to research general Linux hardware support is the Linux Hard- ware Compatibility HOWTO site at www.tldp.org/HOWTO/Hardware-HOWTO. You can find additional Linux hardware compatibility lists at www.linux-drivers.org.
    Installation Methods
    You can choose any of several methods to install Windows operating systems.
    Installation Method
    Local installation source
    Network installation source
    Description
    You can launch the Setup program by booting the computer from a local installation CD-ROM.
    You can launch the Setup program by connecting to a shared network folder that contains the installation source files and running the installation program file manually. In this case, you will need another operating system with net- working capability already installed on the computer, or you will need bootable media such as a floppy disk, USB drive, or CD-ROM drive, with network connection software included. 
Installation Method
Unattended installation
System imaging
Description
You can automate an installation of Windows so that it requires limited or no user intervention. An unattended installation requires you to create an answer file, which is a text file that provides configuration information to the Windows Setup program. Microsoft provides a utility called the Setup Man- ager Wizard that can assist you in creating answer files as well as a batch file that includes the correct Setup command syntax. There are some advanced customization settings you can only implement by using unat- tended installation.
For general information about unattended installations, see the article “Over- view of Unattended Installation” at technet.microsoft.com.
A computer image is a file containing a sector-by-sector replica of a comput- er’s hard disk that can be replicated onto the hard disks of one or more other computers. The image contains the operating system software, such as Win- dows XP Professional, and also the applications, files, desktop settings, and user preferences from a single computer. Imaging provides a rapid way to deploy standardized computer installations. To use system imaging to install Windows, you will need:
  • ●  A reference computer to provide a baseline configuration for other computers. The contents of the reference computer are stored in the com- puter image.
  • ●  A third-party disk imaging application, such as PowerQuest Drive Image Pro or Symantec Ghost, to create the image itself.
  • ●  A software distribution point to store the image. This can be a network share point, or removable media, such as a CD-ROM.
  • ●  Target computers, the new or existing computers on which you deploy an image. Target computers must have the same disk controller type and mass-storage device driver as the reference computer. For example, if the reference computer has a small computer system interface (SCSI) control- ler with a non-generic driver, then the target computer must have a SCSI controller and use the same driver.
    To use imaging to install Windows systems, follow the instructions in your drive imaging software’s documentation.
    Installation Options
    There are various options you can choose during Windows operating system installation.
    Option
    Disk and file system preparation
    Regional and date and time settings
    Computer name Network configuration
    Workgroup or domain membership
    Internet connection method
    Local user accounts
    Description
    You can set up and format one or more disk partitions during installation. If you make an entire disk one partition, you cannot repartition the disk later without either reinstalling the operating system or using a third-party tool. NTFS is the recommended Windows file system because it is well-suited to today’s large partition sizes and provides security and enables file compres- sion and encryption.
    You can set the date and time for your locale and select the appropriate regional settings, such as the appropriate local display format for currency.
    You can give the computer a descriptive name of up to 15 characters. The Setup program might suggest a default name for you.
    You can decide how you want to configure networking settings for the computer. You can accept a Typical configuration or you can configure Cus- tom settings that are appropriate to your environment.
    Domains and workgroups are two different organizational and security models for Windows networking. Domains require a specially-configured Windows Server computer called a domain controller and are most often used in corpo- rate environments with centralized administration. Workgroups are unstructured named collections of individual computers and are usually deployed in homes and small offices.
    You can indicate whether the computer will connect to the Internet using the local network connection or if it will connect to an account from an Internet Service Provider (ISP).
    For Windows XP, if you are installing into a workgroup, you can create local user accounts during installation. You can create additional local users and groups after installation.
    For Windows 2000, if you are installing into a workgroup, you can set logon options for local users. You can configure the system to require each user to log on individually, or you can configure it to log on automatically as a spe- cific user whenever the computer boots.

    page419image22200 page419image22360
    Default Administrator Account
    In addition to the local user accounts you create during or after installation, there is a default user account named Administrator on all Windows XP and Windows 2000 systems. If you are installing Windows XP Professional or Windows 2000 Professional, you can assign this default account a password during the installation process. On all Windows systems, you can use this account to log on and administer the system if there is not another suitable administrative account available.
    Windows Update
    After you have installed Windows, you should obtain the latest updates for that version from Microsoft Windows Update website. The appearance and functionality of the website will be customized for the particular version of Windows you are using, but the updates will fall gen- erally into one of three categories: critical updates, including Service Packs and security- related system patches; optional software updates that provide new tools and functionality; and optional hardware updates such as new device drivers.
    Service Packs and Patches
    Patches are targeted operating system updates that Microsoft releases on an as-needed basis to provide enhancements to the operating system or to address security or performance issues. Service Packs are comprehensive updates that generally include all prior patches and updates, but which can also include important new features and functions.
    Windows Genuine Advantage (WGA)
    Every time you access the Microsoft site, it goes through a process of validating your installation. If Microsoft deems the install to be invalid, you will not be able to proceed with updates and will be instructed to contact Microsoft. 

Troubleshoot CPUs


Troubleshoot CPUs
In the last topic, you resolved memory problems. In addition to memory, the processor is involved in every computer operation and can cause problems throughout the system if it is compromised. In this topic, you will troubleshoot CPUs.
Because the processor provides the computational power that drives everything that a personal computer does, the ability to recognize and resolve processor issues is a critical skill for com- puter technicians.
Common CPU Issues
Most problems with CPUs can be attributed to overheating or outright failure. The main solu- tion to CPU problems is to replace the CPU or the entire system board. When you replace a processor, you must select a processor that is compatible with the type supported by the sys- tem board.
CPU Replacement Tips
Today’s ZIF sockets enable the chip to drop in, which ensures that Pin 1 on the processor is properly aligned with Pin 1 on the socket and that you do not bend the pins when removing or inserting the processor. The chip will fit easily and does not need to be forced; once the chip is in place, you can lower and secure the retaining clip.
CPUs and Cooling Systems
Because CPUs are prone to damage from overheating, you should always consider the cooling system components when you are troubleshooting CPU issues. For instance, if a user is experi- encing intermittent problems during operation, there could be inadequate airflow within the computer chassis that can be corrected by providing space in front of the vents and fans. Also, dust can often accumulate on the CPU’s heatsink, and can reduce the efficiency of the heatsink, possibly causing the CPU to overheat.
When thermal problems cause a system to shut down or fail to boot, it could be that the over- all system cooling is inadequate, a cooling device has failed, or the processor is overclocked, whether intentional or not.
If you suspect the cooling system is a problem, you can add more cooling devices, upgrade to more efficient devices, or replace failed devices.
If you suspect the CPU is overclocked, use BIOS or jumper settings to reduce the CPU speed.
How to Troubleshoot CPUs
Procedure Reference: Troubleshoot CPUs
To troubleshoot CPUs:
  1. If you suspect that overheating is causing CPU problems, verify that the CPU fan is installed and functional. If the fan doesn’t work, replace it.
  2. On older systems, chip creep can occur over time. Reseat the CPU if you think that chip creep might be the source of your CPU problems.
  3. Processors have no serviceable parts. When a processor is defective, you need to install a new one. Thus, CPU failure usually requires you to replace the processor.
Procedure Reference: Troubleshoot Cooling Systems
Problems with cooling systems can often manifest themselves as CPU problems. To trouble- shoot cooling systems:
  1. Verify that the air vents in the computer chassis are not blocked.
  2. Move the system further from the wall if airflow is not sufficient.
  3. Use compressed air to remove dust and dirt from fan components and the CPU heatsink.
  4. Verify that the fan blades are turning freely; remove debris or obstructions.
  5. Make sure the heat sink is securely clipped to the CPU.
  6. If a cooling component has failed, replace it.
  7. Configure the processor to eliminate overclocking.
  8. Inadequate system cooling can create ongoing thermal problems that cause the system to shut down or not to boot at all. If cooling is an ongoing issue, the ultimate solution is to upgrade the cooling system by replacing or adding cooling devices.


Troubleshoot Memory


Troubleshoot Memory
In the last topic, you resolved problems with power supplies. Memory issues can also be the cause of generalized computer problems. In this topic, you will troubleshoot memory.
Memory plays a huge role in every operation done by a personal computer. An issue with memory can result in a wide range of problems and symptoms. As an A+ technician, your abil- ity to identify and solve memory problems will be crucial in providing your users with the optimal computing environment.
Error Checking
Many memory modules include error-checking mechanisms to protect data. The most common are parity and Error Correcting Code (ECC).
Common Memory Issues
Memory problems typically show themselves as memory-specific errors, erratic behavior of the system, or frequent crashes.
Symptom
Computer crashes or reboots; data is corrupted.
Possible Causes
ESD, overheating, or other power-related problems that can affect memory. Registry writing to bad memory, General Protection Faults (GPFs), and exception errors caused by software and operating system.
page401image24464
Symptom
Memory errors appear on screen.
Computer appears to boot; screen remains blank.
Computer does not boot. POST beep codes sound.
Some or all newly installed memory is not recognized.
Possible Causes
Memory address errors at boot time. Memory mismatch errors in which you are prompted to specify how much RAM is installed to clear the message. Applications that require large amounts of memory or that don’t properly release memory.
Memory is not correct for the system. For instance, the computer is expecting memory that uses error checking and you installed non-parity memory. Memory module is not fully inserted into the slot.
CPU cannot communicate with memory due to the memory being improperly installed or the BIOS not recognizing the memory. Beep codes are specific to the BIOS manufacturer and the ones for memory can be found in the manufacturers’ beep codes list.
You exceeded the maximum amount of RAM that can be addressed by the system. Even though the slots can accept SIMMs containing more memory, the system can only recognize a certain amount of memory on most systems. The wrong memory type was installed. The memory was not installed in the proper sequence. You might need to leave empty slots between multiple modules, or you might need to install modules contain- ing more memory in lower-numbered slots than smaller modules.
How to Troubleshoot Memory
Procedure Reference: Troubleshoot Memory Problems
To troubleshoot memory problems:
  1. Perform a virus scan. Viruses can cause symptoms that mimic those of a memory problem.
  2. Verify that the correct memory modules were installed in the system. You can check the part numbers against the memory or PC manufacturer’s website. For example, be sure that you aren’t trying to use DDR2 RAM in a DDR RAM system.
  3. Verify that the memory was installed and configured properly. Older systems required that memory be installed in pairs. In all cases, verify that the memory modules are fully seated. Always start with memory in the first bank. Check your documentation for other requirements specific to your system.
  4. Try swapping the memory between slots. For example, if you only experience problems when many applications are open, the chance is that one of the memory modules in the higher banks is the problem. If the system won’t boot, try one of the other modules in the first bank to see if it then boots. Try putting a known good module in the first slot and removing all of the other memory modules.
  5. Check for BIOS upgrades. If there are known problems, then a fix has probably been issued. This usually applies to older systems.


Troubleshoot Power Supplies


Troubleshoot Power Supplies
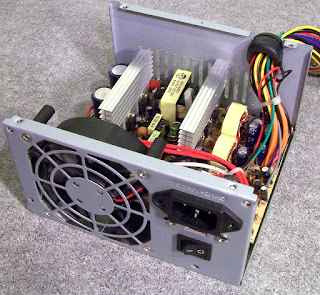
In the last topic, you identified and corrected problems with storage devices. Another personal computer component that is required for the system to operate is the power supply. In this topic, you will troubleshoot power supplies.
Underpowered systems, especially older systems with relatively small power supplies, can experience lockups, random reboots, and other quirky behavior. As an A+ technician, you will be required to test and troubleshoot power supplies.
Common Power Problems
Power problems can result in data loss, erratic behavior, system crashes, and hardware damage, and the more severe the problem, the more severe the consequences.
Power Problem
Line noise
Power sag
Power undervoltage or brownout
Possible Causes
EMI interference.
RFI interference. Lightning.
Defective power supply.

Many electrical systems starting up at once. Switching loads at the electric company utility. Electric company equipment failure. Inadequate power source.
This symptom can last from several minutes to several days and can be caused by any of the fol- lowing:

Power Problem
Overvoltage
Power failure
Possible Causes
Suddenly reduced loads.
Equipment with heavy power consumption is turned off.
Power company switches loads between equipment.

Lightning strikes.
Electrical power lines down. Overload of electrical power needs.

page393image5080 page393image5240
Common Power Supply Issues
Power supply damage from overheating, lightning strikes, or short circuits can produce a num- ber of symptoms.
Symptom
Fan will not work.
Possible Cause and Solution
The fan and openings around the power supply bring in air to cool sys- tem components, but they also allow dirt and dust to gather around the power supply. This can cause the fan bearings to wear and the fan to turn more slowly. You can use compressed air to remove this debris from the system. If the fan becomes damaged due to dust, replace the power sup- ply or have qualified personnel replace the fan.
page393image15272
Symptom
Computer won’t start or reboots after startup.
Possible Cause and Solution
  • ●  If the computer doesn’t start at all, make sure that there is power to the outlet. You can do so by plugging in a lamp or other device that you know works. If that doesn’t turn on, you know that you have a bad outlet and not necessarily a bad power supply.
  • ●  Check that the connections from the power supply to the system board are secure, especially on ATX systems. Make sure the master switch to the power supply, at the rear of the system, is on, before pressing the computer’s power button. Also on ATX systems, check the voltage of the power being supplied.
  • ●  A loose power supply rail landing on exposed metal can short-circuit the power supply. The power supply can detect this problem and dis- able itself. If you fix the short (by putting the power cable onto the drive correctly), the power supply should start working again. Unused rails should be either covered (some bring rubber end caps) or tie- wrapped to a safe location (not too tight to avoid damaging the wire). Also check for loose screws or foreign metallic objects that can cause shorts.
  • ●  Check power supply rail voltages with a digital multimeter, to verify that the necessary voltages are being provided to the board. This will not measure voltage under load, but will allow you to determine whether the rails are working properly. Most motherboards also pro- vide a voltage reading within the BIOS. If the system boots, access this BIOS option to obtain readings as detected by the motherboard.
    Other components, especially drives, can also sometimes make a lot of noise. Make sure this isn’t where the noise is coming from.
    A whine or squeal from the power supply area is usually from the fan. A damaged fan with worn bearings will cause a grinding whine that wors- ens with time. Sometimes, when the bearings begin to fail, the fan blade assembly will shift, rubbing against the fan grill or the case, and produce a high-pitched noise. Also possible, after cleaning with compressed air, a wire inside the power supply unit was shifted by the forced air and is now touching the fan, causing the very loud grinding noise, possibly stopping the fan altogether. With the power supply off, you can attempt to carefully shift the wire away from the fan by using a plastic tool (metal not recommended so as to avoid damaging any components).

    If the noise is not from the fan, but from another power supply compo- nent, replace the power supply or take it out and send it for service.
page394image24912
Noise coming from power supply.
How to Troubleshoot Power Supplies
Procedure Reference: Test a Power Supply With a Multimeter
To use a multimeter to test a power supply for proper output voltage:
  1. Prepare the computer.
    1. Shut down the computer.
    2. Disconnect all cables externally connected to the chassis.
    3. Remove the computer enclosure (cover).
    4. Locate a spare Molex connector, and remove it from the bundle if necessary so that you can easily access it without having to reach inside the case to work with the connector.
    5. Reconnect the power cable.
    6. Power on your computer.
      1. Measure the 5 volt output from the power supply.
        1. Set your multimeter to measure DC voltage with a scale that will permit readings in
          the +5 volt range.
        2. Insert the multimeter’s black probe into the black (GND) lead of the power connector.
        3. Insert the multimeter’s red probe into the red (+5) lead of the power connector.
        4. Examine the voltage measured by the multimeter. It should be approximately +5 volts.
      2. Measure the 12 volt output from the power supply.
        1. If necessary, set your multimeter to measure DC voltage with a scale that will permit
          readings in the +12 volt range.
        2. Insert the multimeter’s black probe into the black (GND) lead of the power connector.
        3. Insert the multimeter’s red probe into the yellow (+12) lead of the power connector.
        4. Examine the voltage measured by the multimeter. It should be approximately +12 volts.
          4. Restore the PC to service.
          1. Shut down the computer.
          2. Disconnect the power cable.
          3. Rebundle wires and return the Molex connector to the location from which you got it.
          4. Replace the computer enclosure (cover).
          5. Connect all cables externally connected to the chassis.
          6. Power on your computer.
          Power Supply Wire Color Conventions
          System components cannot use the 120-volt power coming directly from the electrical outlet. The power supply steps the voltages down to 3.3-, 5-, and 12-volt connections for system components. Wires are color-coded as to their voltages. The following table shows the wire color for each voltage connection.
          Color or Component Voltage
          Yellow wire +12 Blue wire -12 Red wire +5 White wire -5 Motor +/-12 Circuitry +/-5
          Power Supply Testers
          Although you can use multimeters to test power supplies, there are also specialized tools called power supply testers that are simpler to use for this purpose, and that perform more compre- hensive tests. For instance, you can test the various power connectors (Berg, Molex, AT, and ATX). You can also use them to test the power supply under load.
          Procedure Reference: Troubleshoot Power Problems
          To troubleshoot power problems:
          1. If the fan does not appear to be working and the system doesn’t come on or abruptly shuts itself down, address the problem as soon as possible. Leaving the problem alone would allow heat to build up to dangerous levels, causing serious damage to the system, and possibly fire.
          1. Unplug the system and remove the system cover.
          2. Using compressed air, blow out any dust around the fan spindle.
          3. Verify that there is no obvious reason that the fan is not spinning.
          4. If these suggestions do not fix the problem, replace the power supply. Remember, do not open a power supply as there is a high danger of electrocution. 


Troubleshooting System Components


Troubleshoot Storage Devices
In this lesson, you will troubleshoot system components. The first component inside the com- puter case that might need troubleshooting are the storage devices. In this topic, you will troubleshoot storage devices.
Storage devices, because they are one of the few system components that contain moving parts, are particularly susceptible to wear and damage. There is a saying that there are two types of storage devices: the ones that have failed and the ones that are failing. Because these devices support so many system functions, it is not always obvious that the device is the cul- prit, yet storage device problems (particularly those involving hard drives) can have a truly devastating effect on a system and on a user’s productivity. Therefore, being able to spot, iden- tify, and correct storage device problems early, before they cause data loss, will be an important skill for you as a support technician.
Common Storage Device Issues
Each type of storage device has issues specific to that device. You will need to recognize the symptoms, problems, and solutions for each issue.
Troubleshooting Hard Drives
There are many problems you might encounter when troubleshooting hard drives.
Hard Drive Symptom
Boot error message: Drive Not Ready—System Halted
POST error codes in the 17xx range
Possible Problem and Solution
Drive is damaged.
Drive is not configured for Master or Cable Select as appropriate to the system.
Data cable is not connected or incorrectly connected to the drive. Solution: Visually inspect the drive and its connections, correct as needed.

1701: Drive not found.
1702: Hard drive adapter not found.
1703: Hard drive failure.
1704: Hard drive or adapter failure.
1780, 1790: Hard drive 0 failed.
1781, 1791: Hard drive 1 failed.
1782: Hard drive controller failed.
Solution: Visually inspect connections and reconnect drive. Replace failed component.


Hard Drive Symptom
Can’t read from or write to the drive
Possible Problem and Solution
Bad sectors on the drive.
IRQ conflicts.
Drive failure.
Virus attack. Some problems that appear to be storage device problems are actually virus infections. These can cause physical damage as well, but they usually just damage the files on the stor- age device and not the device itself.

Solution:
  • ●  Run chkdsk to try to recover information from bad sectors and to mark those sectors as unusable.
  • ●  Check Device Manager for hardware resource conflicts and for indications of drive failure.
  • ●  Run virus check software and remove any viruses found.
    Drive disconnected, damaged, not recognized by the BIOS. Solution: Visually inspect and reconnect drive. Enable drive in CMOS setup utility.
    Physically damaged drive, most likely due to a head crash. Solution: Replace the hard drive. Remind users and technicians not to move a machine while it is in use because that is the most common cause of head crashes.
    System not being shut down properly, drive is in the process of failing, virus.
    Solution: Educate users on how to properly shut down the system. Run virus protection software. Back up the data, replace failed or failing drive.

    Drive is too full or fragmented. The hard drive controller is too slow. An incorrect (and slower) cable was used to connect the drive.
    Solution: Delete all unneeded files. Defragment the drive. Verify and replace the hard drive cable if necessary.

page370image16392
Computer will not boot
Repeated grinding noises
Data corruption or utilities not running properly
Hard drive is slow
page370image18432
Troubleshooting Optical Drives
There are some common problems you will encounter with optical drives.
Optical Drive Symp- tom
Cannot insert optical disc into drive
Drive mechanism won’t pull disc or tray in
Possible Problem and Solution
Misaligned case, which prevents drive door from opening and the tray from moving in and out properly.
Solution: Realign the optical drive within the computer case.

The gears may be stripped, especially if the user pushed on the tray directly rather than using the buttons to manipulate the drive. Solution: Replace the drive and educate the user on how to prop- erly insert and remove discs.

Optical Drive Symp- tom
Unable to read an optical disc
Drive will not release the disc
Can’t hear sound or music when playing an audio CD
Intermittent optical drive problems
Unable to read CDs you have burned
Unable to view DVD mov- ies
Possible Problem and Solution
Inexpensive trays in drives or stickers that don’t cover the entire surface of the disc can cause it to wobble because it throws the balance of the drive off. Data can be difficult or impossible to read because of the wobble.
Solution: Remove the sticker if it is uneven. If the tray is the problem, replace the drive.
Sometimes this occurs because the software is still accessing the disc, or the tray can simply be stuck.
Solution: Carefully insert a straightened paper clip in the hole in the front of the drive and gently push in to release the catch on the drive so that you can remove the disc.

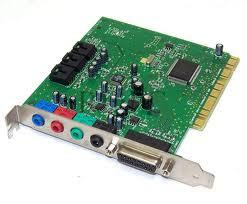
The wires from the CD drive to the sound card are disconnected. Other possibilities are that the speakers are turned off or down or that the sounds were muted through the Windows settings. Solution: Connect the wires between the CD drive and the sound card. Verify that sound is not muted and that the speakers’ volume is set properly.
Corrupted or outdated drivers.
Solution: Uninstall and reinstall the drivers. Install updated drivers.

Possibly data corruption in the burn process, attempting to burn at higher speeds than the media supports, overtaxing the processor by running other programs while burning, problem with the CD burning application. Most programs will warn the user of any such problems, but sometimes users turn off such notifications (or verification of the burn) and will not be informed there is a problem.
Solution: Re-create the CD with proper settings.
Solution: Make sure that your drive, video card, and its drivers support DVD video, and that you have the necessary software to play a movie.
Troubleshooting Floppy Drives and Tape Drives
There are some common problems you will encounter with other drive types.
Other Drive Type Symptom
Unable to write to a floppy disk
Unable to read a floppy disk
Possible Problem and Solution
The disk might be write-protected, not yet formatted, or the floppy disk drive might have failed.
Solution: Remove write protection from the disk. Format the disk. Replace the floppy disk drive.

The disk might be corrupt or infected with a virus.
Solution: Scan the floppy disk for viruses. Check to see if you can read the disk in another computer’s floppy disk drive. Verify that the disk wasn’t formatted with another operating system.

Other Drive Type Symptom
Unable to remove floppy disk
Unable to insert a tape cartridge into an internal tape drive
Unable to read from or write to a tape cartridge
Possible Problem and Solution
If you insert a floppy disk with a damaged metal shield, it might not come out all the way when extracted. Do not yank it out and leave the shield and spring inside the drive; you might need to remove and open the drive to remove the disk.
Solution: Back up data from damaged floppies and discard them.
The computer case is not properly aligned with the chassis, mak- ing the opening for the internal drive difficult to access.
Solution: Check the alignment of the computer case and correct it if necessary.

The tape drive might be dirty or the tape cartridge itself might be damaged. There might be foreign material or a broken door flap obstructing the drive.
Solution: Clean the tape drive. Remove or repair obstructions. If possible, attempt to read the tape cartridge in another tape drive. If you can’t read the tape cartridge, odds are it is corrupted and might not be recoverable. If the tape cartridge is physically dam- aged, discard it. (Always keep multiple backups of important data.)


ATA Drive Troubleshooting Tips
There are some important points to keep in mind as you troubleshoot PATA drive problems.
PATA Issue
Configuring single drives
Configuring two drives
Removing a drive
Description
If you have one drive on a channel, depending on the manufacturer, it might need to be configured as single—not master or slave. Alternatively, set it to cable select and plug it in to the Parallel ATA cable connector furthest from the motherboard. Check your manufacturer’s documentation for the proper procedures and settings for your drive.
With two drives on a channel, set both to cable select or configure them both manually, setting one to master and the other to slave. Don’t mix these settings by setting one to be cable select and the other as either master or slave. Make sure both aren’t set to master or slave.
If you remove the second Parallel ATA hard disk from a computer with two drives installed, verify that the disk that remains in the computer is set as single. The Master/Slave setting should be used only when there is more than one hard disk in a system; otherwise, a disk-controller error will occur when you restart the computer.
PATA Issue
Moving to another system
Description
If you need to move a Parallel ATA drive from one computer to another, you likely won’t run into problems. However, especially if there is a great difference in age between the computers, you might run into problems. The BIOS of another com- puter might not support LBA or Large (ECHS), or the computer might not be set up for it. In that case, data on the hard drive would be lost if you install it in that system. You can change the mode for a hard drive (from LBA to Large, or vice versa), but this poses a risk of data loss. Typically, you should only set the mode when you first install the disk. If you do need to change it, make sure you have a working backup of all of the data on the disk before doing so.
page373image9496 page373image9656
There are several points to keep in mind when troubleshooting SATA drive problems.
SATA Issue
Controller card
Controller driver
Drive not detected
Drive size limitation
Speed limitation
Description
Not all SATA controller cards are supported on all operating systems. Check the vendor specifications for the operating system or software you are using.
SATA drives themselves do not require drivers, but the SATA controller does. Ensure that you are using the latest version.
If you install a fresh copy of your operating sys- tem and the SATA drive is not detected, then restart the setup process and press F6 when prompted to install the driver.
If the SATA controller drivers are not loaded dur- ing the operating system installation, then the drive will only report the 137 GB capacity supported natively by the operating system.
1.5 gigabits per second (gbps) SATA cards do not always auto negotiate with newer 3.0 gbps drives. Use jumper settings on the drive to limit the trans- fer rate to 1.5 gps. 

SCSI Drive Troubleshooting Tips
Keep some basic points in mind as you troubleshoot SCSI drive problems.
Issue
IDs and termina- tion
Resetting system
Description
The vast majority (up to 95 percent) of problems with SCSI disks are due to incor- rect ID settings and improper termination. Verify that all SCSI devices have unique SCSI ID numbers and are properly terminated.
When a SCSI system is booted or reset, SCSI controllers generally need to renew all SCSI device connections before activating the devices, causing a delay during POST. 
page372image13984 
page370image25712 page370image25872
page369image19648 page369image19808

Troubleshoot Adapter Cards


Troubleshoot Adapter Cards
In the last topic, you resolved problems with input devices. Adapter cards can also have problems. In this topic, you will troubleshoot adapter cards.
Your mechanic often knows just what component in your car is acting up based on your description of the way your vehicle is acting. Knowing the common problems associated with adapter cards will enable you to quickly correct the problems your users encounter. Being able to quickly resolve problems for your users will make them more productive.
Common Adapter Card Issues
Other than hardware or system resource conflicts, there are several common problems you will encounter with adapter cards.
Symptom Possible Causes and Solutions
page354image8072
Adapter works until you replace the system case.
Card works in all slots but one.
  • ●  Possible cause: Adapter card is damaged or grounded against the case, or the cables are pinched, compressed, or pulled out if there is not enough room for all components in a low-profile or compact case.
  • ●  Solution: Visually inspect card and case for bent or damaged areas. If the card is in contact with the case, it can cause electrical shorts or other faults.
  • ●  Possible cause: Bus slot damaged.
  • ●  Solution: Visually inspect the bus slot. Test the bus slot with a multimeter; voltages should be within prescribed ranges for the slot and adapter card. Take care when testing voltages on a PCI slot; if you short pins you can damage the system board or other components. If the damage is confirmed, use another slot or replace the system board.
  • ●  Possible cause: Grounding or heat-related problems due to proximity to another card. This is very likely with the larger video cards with large heat sink/fan assemblies. Some cards can take up two slots and will generate considerable heat, which can overheat a card fractions of an inch away and with little if any airflow.
  • ●  Solution: Move the cards to slots that are further apart.
  • ●  Possible cause: Certain cards can conflict with cards in other slots.
    This is more common in older systems.
  • ●  Solution: Check the manufacturer’s recommendations for spacing out cards, or using a specific recommended slot (for example, install a par- ticular card in the slot closest to the processor).
  • ●  Possible cause: Cables not connected, loose, or damaged.
  • ●  Solution: Visually inspect cards and cables and reconnect if necessary.
Card tests fine and slot tests fine, but services are unavailable.

Symptom
Services or devices work intermittently.
Possible Causes and Solutions
Possible causes:
  • ●  Adapter card (or cards) not seated properly.
  • ●  Hardware resource conflict.
  • ●  Adapter card physically damaged.
  • ●  Adapter card electronically damaged. Solutions:
  • ●  Reseat adapter card (or cards).
  • ●  Resolve any hardware resource conflicts.
  • ●  Replace any adapter card that is physically damaged.
  • ●  Replace any adapter card that is electronically damaged.
CompTIA® A+® Certification: A Comprehensive Approach for all 2006 Exam Objectives
page355image6976 page355image7136 page355image7296
How to Troubleshoot Adapter Cards
Procedure Reference: Troubleshoot PC Adapter Card Problems
To troubleshoot some of the most common problems with adapter cards:
see if this fixed the problem.
  1. If a video card is having troubles, determine if it is in a PCI, ISA, or AGP slot. If it is not in the AGP slot, try moving the card to another slot. Because there is only one AGP slot on the system board, you cannot move an AGP card to a different slot.
  2. Remove the card and press down on all four corners of socketed chips to verify that they are fully seated, and then reinstall the card.
  3. If another hardware device has recently been added to the system, check Device Manager and verify that there is not a resource conflict between the device and the adapter card.
  4. Verify that the drivers are properly installed. You could use the Add/Remove Hard- ware Control Panel utility to remove all the drivers for the card, then restart the system. It should detect the ′′new′′ hardware and install the drivers again. You can also remove the card, then restart to remove the drivers. Then, reinstall the cards. When you restart, the drivers should be installed. If you’re servicing a legacy system that doesn’t support PnP configuration, consult your adapter card’s documentation to determine how to verify, remove, or install the necessary drivers.
  5. If necessary, update the firmware or drivers associated with the device.
    2. If
    you suspect a resource conflict between devices:
    1. Open Device Manager and display the Resources By Connection view.
    2. Determine if there is a conflict between any devices. ISA cards cannot use the same
      IRQ as another card. IRQs have been set aside for PCI cards to share with each other. However, the PCI cards cannot share that IRQ with ISA cards.
    3. Change the conflicting resource to an unused setting. This might be the IRQ, DMA, or I/O address.
    4. Verify that both devices now work properly.
    you suspect a card was damaged due to electrostatic discharge (from improper han- dling, power surges, or a lightning storm):
    3. If
    a. Check whether the card in question is listed in Device Manager.

    4. If
    1. Display Properties for the card and verify whether the Device Status indicates that it is working properly.
    2. If the device is not working properly, click Troubleshoot and follow the Troubleshoot Wizard steps.
    3. If the problem is not resolved, replace the card and verify that the problem has been resolved.
      you have a problem with a device, and replacing the device, device cable, and device
    power cord doesn’t fix it, then you should suspect the adapter card. This applies to any adapter card, including ISA, PCI, AGP, and others. To test if this is the problem:
    1. Remove the problem device from the port.
    2. Connect a replacement device to the port.
    3. If necessary, install drivers for the new device. If it works, then the adapter card is okay. If it doesn’t work, then try replacing the cable between the device and the port.
      Troubleshoot Multimedia Devices
      In the last topic, you resolved problems with adapter cards. Another group of peripheral devices that you need to be able to troubleshoot is multimedia devices. In this topic, you will troubleshoot multimedia devices.
      Although multimedia devices typically aren’t critical for a user to complete his or her work, they are usually the devices that give the user the most satisfaction while working. As an A+ technician, you can keep your users happy by making sure they’re able to take full advantage of the multimedia components included with their computers.
      Common Multimedia Device Issues
      There are common symptoms that you can encounter when troubleshooting multimedia devices.
      Symptom
      No sound coming out of the speakers. The speakers have never worked.
      Possible Problem and Solution
      Problem:
      • ●  The drivers are not installed or are corrupt.
      • ●  The speakers, sound card, or both are bad.
        Solution:
      • ●  Verify that the speakers are plugged into the correct port, turned on, and connected to the computer.
      • ●  Check the volume settings within Windows using Control Panel or the Volume System Tray icon.
      • ●  Verify that you’ve configured the sound card properly within Win- dows by using the Sounds And Audio Devices Properties dialog box.
      • ●  Check Device Manager to make sure it is reporting any problems with the sound card and its drivers.
      • ●  Install or reinstall the most current drivers for the sound card and computer operating system.
      • ●  Try plugging the speakers into a sound card that you know works to determine if they’re bad.
      • ●  Try plugging a known good pair of speakers into the suspect sound card to determine if it is bad.
        Problem:
      • ●  The microphone is plugged into the wrong port on the sound card.
      • ●  The microphone is muted within Volume Control.
      • ●  The microphone is bad.
      • ●  The microphone is not selected as the input device.
      • ●  The microphone is not sensitive enough, or the microphone came from another system and its sensitivity does not match the sound device’s specifications.
        Solution:
      • ●  Verify that the microphone is connected to the correct port on the sound card.
      • ●  Check the microphone volume settings by choosing StartAll ProgramsAccessoriesEntertainmentVolume Control.
      • ●  Test the microphone on a computer with a properly functioning sound card and microphone.
      • ●  Connect a known good microphone to the computer.
      • ●  Switch the audio mixer software to Recording and verify that the microphone is selected as the input device. In Windows, you can use the Sounds And Audio Devices Control Panel application to manage audio settings.
      • ●  In Windows, you can enable Mic Boost in the Sounds And Audio Devices Control Panel application.
      The microphone doesn’t work or is too low.
      CompTIA® A+® Certification: A Comprehensive Approach for all 2006 Exam Objectives
      page361image23440 page361image23600 

page354image25328